
Painting with Paper | Collage Demo with Carole Rabe
CAROLE RABE creates collage art with a little glue and a collection of color swatches.
Learn to paint with paper using these collage techniques from Carole Rabe, featured in the Nov/Dec 2022 issue of Artists Magazine,
I’ve been deeply committed to oil painting for many years, but recently, I felt I needed a break from my intensive work with that medium. I wanted something that was more immediate, that used simple tools and easily manipulated materials and that encouraged new ways of seeing.
I often tack painted swatches to my work in order to test a color adjustment without altering the painting. All those leftover swatches led me to collage—an art-making method that involves gluing two-dimensional materials, such as paper, newsprint, wallpaper and fabric, onto a backing in order to create an image. I realized my swatches would make excellent collage material, and I started making more of them, using leftover oil paint at the end of a painting session.
I decided to use my oil paintings as subject matter for my collages. Those paintings provided a good foundation for my work, so I could focus primarily on color relationships while revisiting and re-exploring ideas. I found that I could create subtle value shifts, vary color temperature, play with the illusion of space, manipulate shapes and create different surface textures—many of my primary concerns and joys when using oils. I was painting with paper! I also loved that the limitations imposed by my box of colored swatches forced me to think of color in inventive ways—similar to my explorations when working with a limited paint palette.
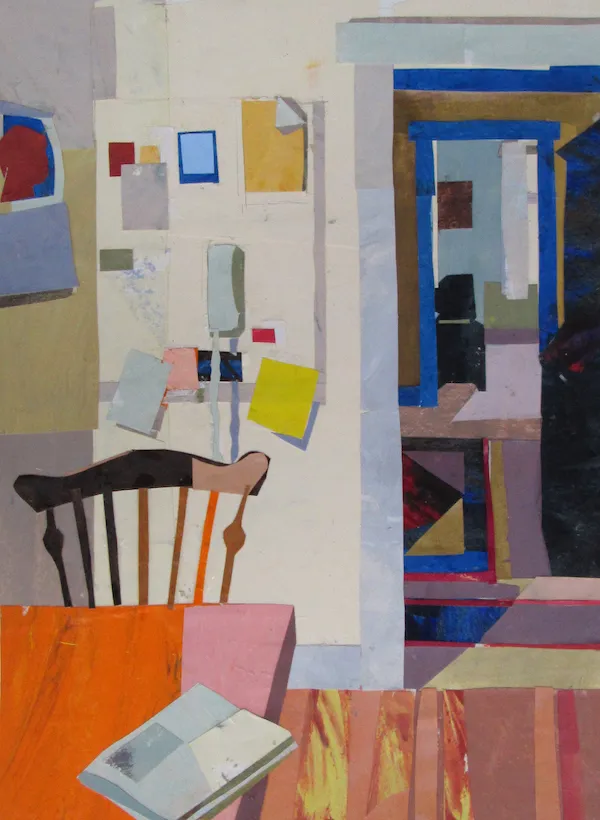
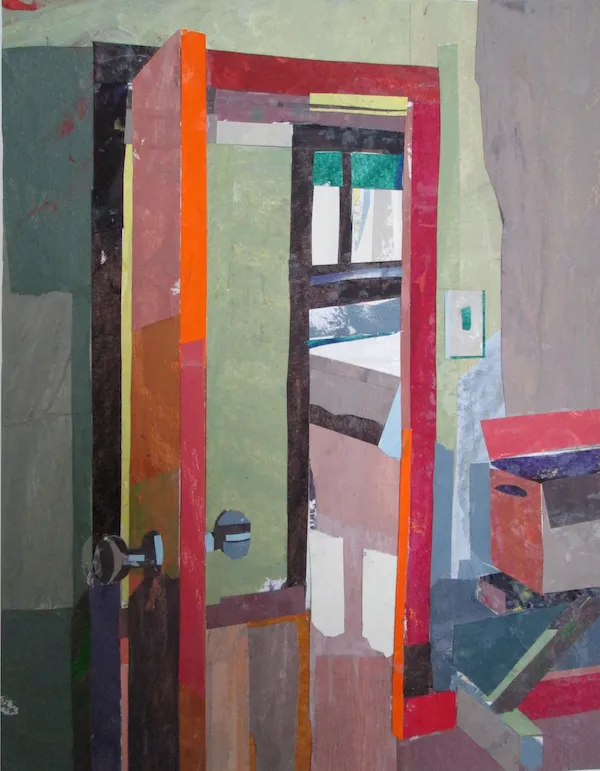
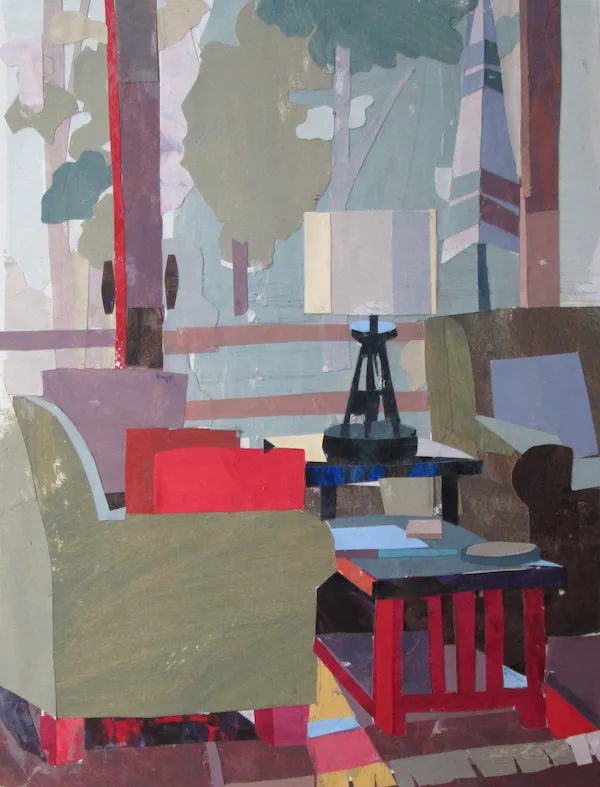
Although my collages closely echo my paintings, the colored-swatch versions offer a different sensibility and scale. I found it ironic that I’d started making paint-swatch collages as a way to quickly explore ideas, but in some instances, I spent more time completing the collages than I’d taken to create the original painting.

My collage method works for me, and you can see a demonstration of my approach below—but there are many ways to create a collage. That’s what makes the medium so fun. You can begin experimenting without a huge investment in materials, time or preliminary sketches—just find or make some swatches, start moving shapes around, cut, paste and enjoy the process. You’ll develop your personal method of expression as you work.
Collage Demo
Materials
SURFACE: Crescent Collage or Illustration Board—or any heavy cardboard.
COLLAGE MATERIAL: color swatches created by applying leftover oil paint, using brushes or a painting knife, onto lightweight, acid- free drawing paper
GLUE: Lineco Neutral ph Adhesive, which allows for easy positioning of collage papers, dries cleanly and, once dry, keeps swatches permanently in place; other options include acrylic gel medium or Nori paste.
OTHER:
- HB pencil
- tracing paper
- two pairs of high-quality scissors—one for basic cutting and a smaller pair for fine work
- X-Acto knife with No. 11 blade for fine cutting and positioning of swatches
- Ruler
STEP 1
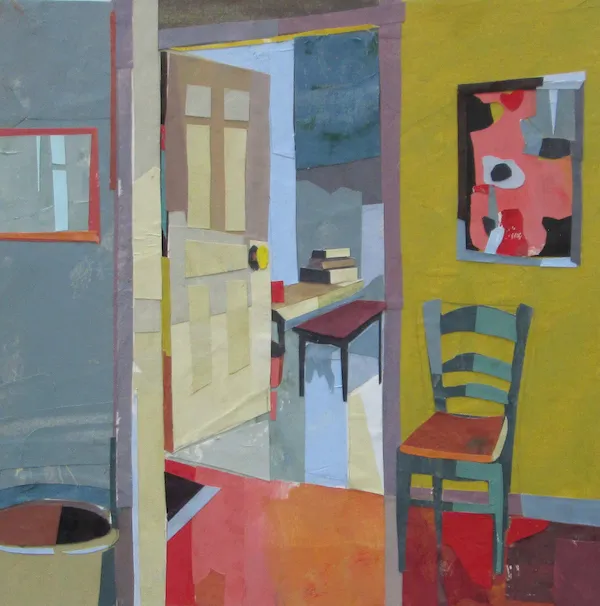
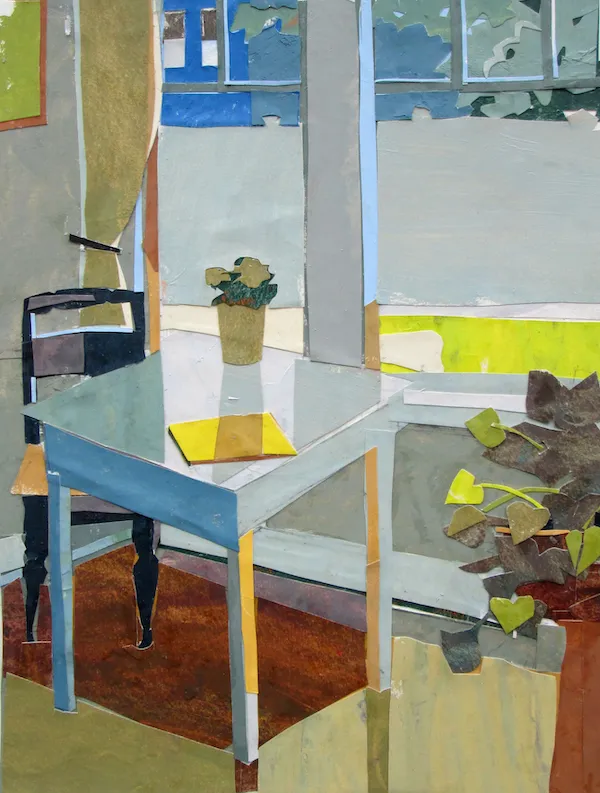
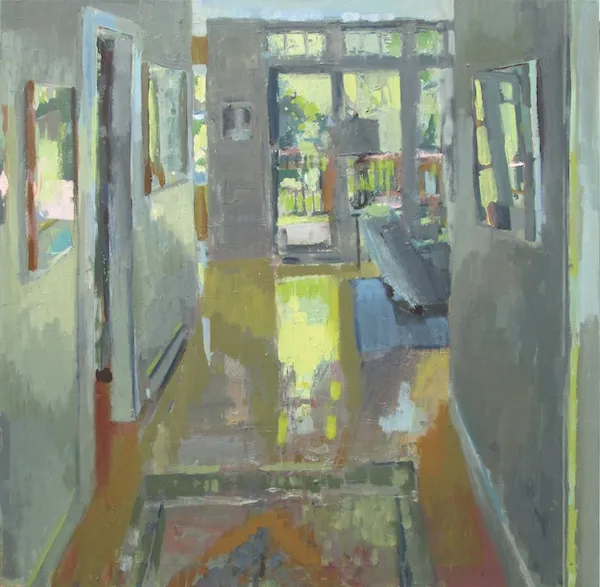
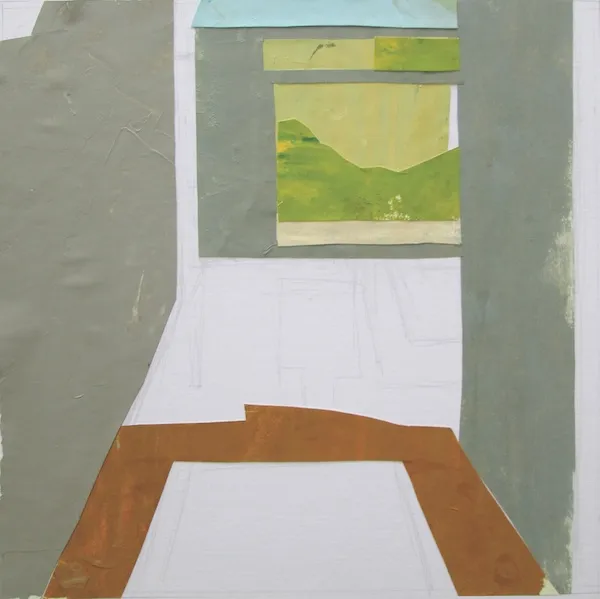
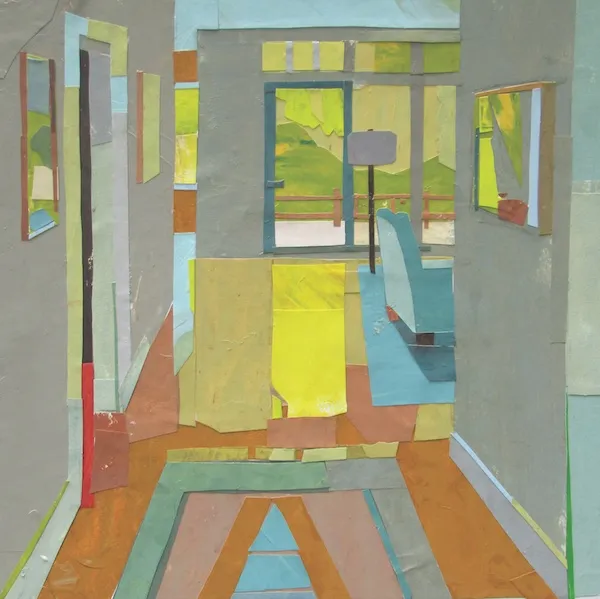
Choose reference image: I selected my 30×30 oil painting, Yellow Leaves, as the inspiration for my collage.
STEP 2
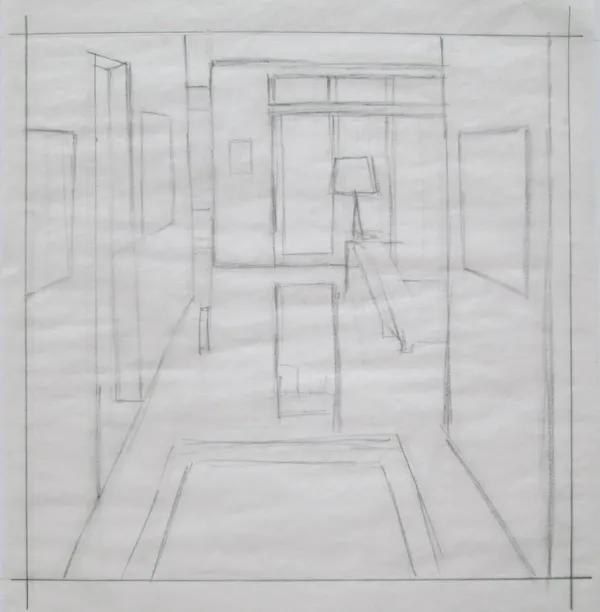
Make drawing and tracings: Using an HB pencil, I drew a cartoon of the composition in a 10×10-inch area of my collage board. This left a 3-inch border, which would allow for easier matting when the collage was complete. I followed the composition of the original painting closely because I wished to reinvent the painting with new color and value relationships. I then made two tracings of the cartoon. One of these would be cut into pieces; the other would come in handy, as the collage developed, for finding a particular shape that had become hidden under glued papers.
STEP 3
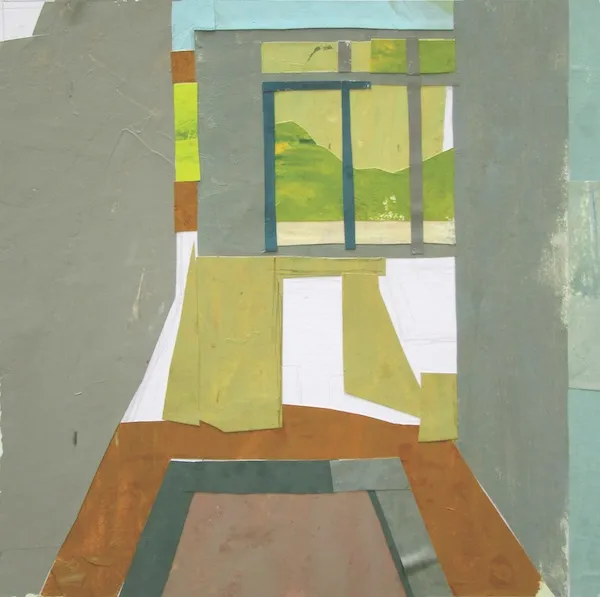
Make a color plan and gather swatches: My next step was to determine how I wanted to approach color. For example, I could explore complementary color relationships, a cool or a warm palette, or a high-key value range. In this instance, I decided on a dominant color scheme of yellow, blue and green—adjacent hues on the color wheel. I wanted to keep most of the colors neutral and close in value—except for a pop of pure yellow for the floor reflection.
I started gathering color swatches, knowing I could add or subtract to these as the picture developed.
STEP 4
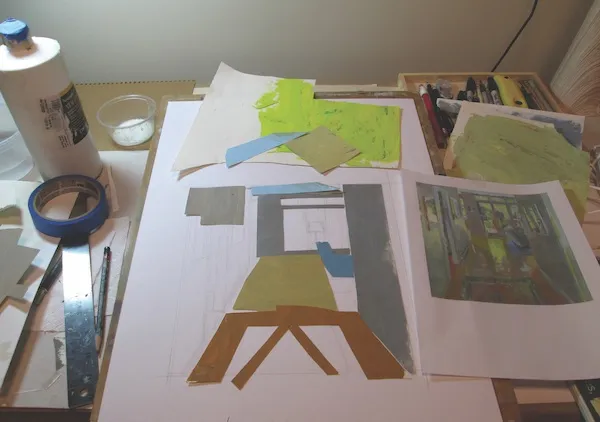
Look for similarities and start cutting: Next, I looked for colors and values in my reference that are somewhat alike. This helped me see where I could use the same colored swatch in
a number of areas throughout the picture. Repeating colors unifies a collage, just as it does in an oil painting. To cut collage shapes accurately, I placed one of the tracing-paper drawings directly on the color swatch and cut through both papers. I then placed the shapes on the board without gluing. This allowed me to rearrange or recut shapes, as necessary. I make about 12 shapes before I considered pasting.
STEP 5
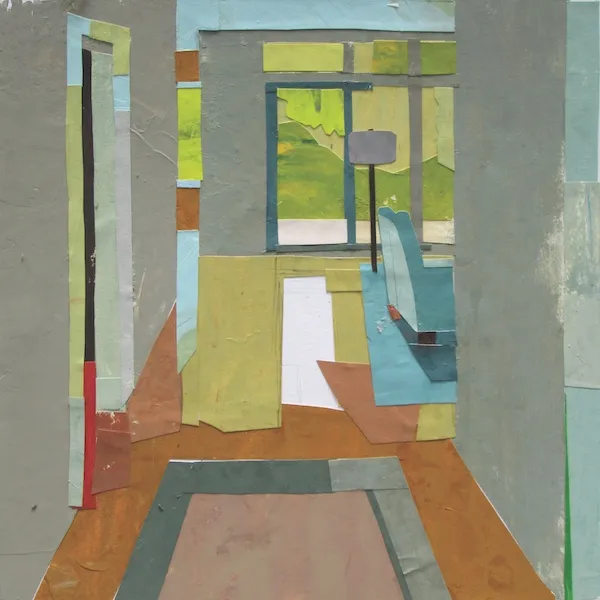
Refine shapes and begin pasting: Before I glued a shape, I refined its contour, using my sharpest, tiniest scissors. I prefer scissors to an X-acto knife for this task. When the shape was ready, I coated its entire back with glue and placed it on my collage board. I used an X-Acto knife to slide a swatch into a precise position while the glue was still wet.
STEP 6
Continue pasting: I worked all over the collage and developed it as a whole, just as if I was painting. I established the larger areas first and then addressed the more specific shapes, modifying my work as necessary. Sometimes I could peel off a shape I wanted to change, but if the glue had set, I pasted another shape over the earlier one. I extended my swatches slightly beyond the image area to ensure that a framing mat would cover the collage’s edges.
STEP 7
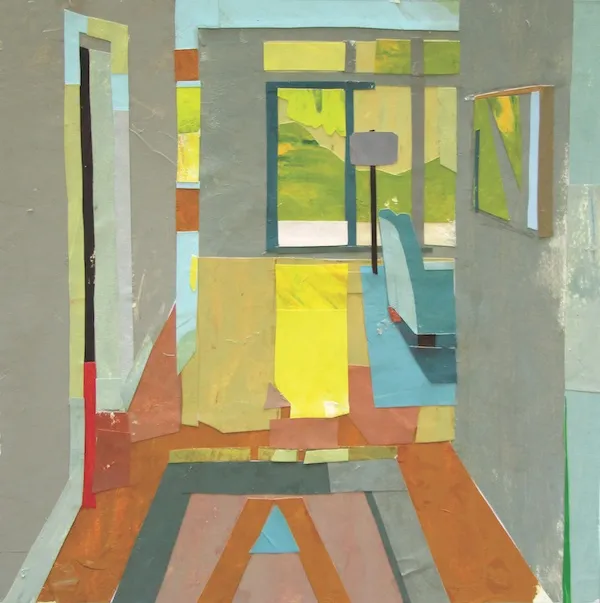
Refine the image: The last few details were the most critical. In this collage, the yellow reflection on the floor is the focal point—and it influences all the areas around it. I considered leaving out the pictures hanging on the walls but decided to include them. I kept the values of these pictures close except for a few pops of yellow-green, which tie into the floor reflection. Those small bits of color unified the design and created lively color relationships.
STEP 8
Finishing details: I made sure all the papers were glued securely and cleaned up any glue residue by gently rubbing a clean finger or soft cloth over the surface. Here you see my completed collage, Yellow Reflection (10×10), which I later placed in a simple maple frame with a warm white mat and Plexiglas.
Meet the Artist
CAROLE RABE (carolerabe.com) holds a BFA from the University of Hartford and an MFA from Boston University. She has worked as a program coordinator and assistant professor of visual arts at Pine Manor College, in Chestnut Hill, Mass., and as a painting instructor at the Danforth Museum School, in Framingham, Mass. Her work frequently appears in exhibitions and has been featured in a variety of publications, including the December 2019 issue of Artists Magazine.